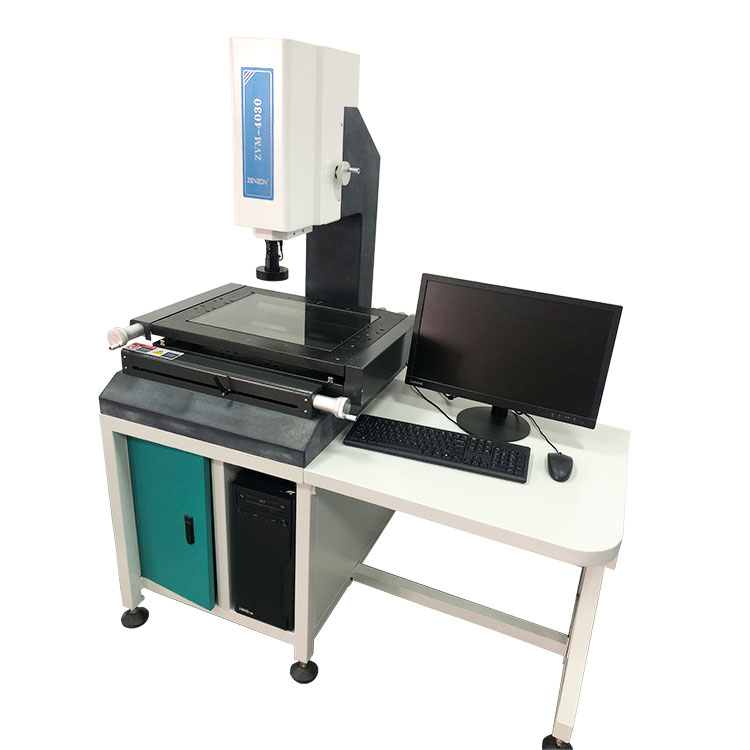
What are the key components and features of this Manual Video Measuring Machine
2023-10-26
A Manual Video Measuring Machine (VMM) typically consists of several key components and features that work together to facilitate precise measurement and inspection tasks. Here are the main components and features commonly found in a Manual VMM:
1. Measurement Stage or Worktable: This is the platform on which the object to be measured is placed. It should be stable and provide precise movement in the X, Y, and Z axes to position the object accurately.
2. Digital Camera: A high-resolution digital camera or imaging system is used to capture images of the object under inspection. The camera is often mounted on a Z-axis column, which allows for focusing and zooming.
3. Lighting System: Controlled illumination is crucial for capturing clear and detailed images. VMMs have adjustable LED or fiber-optic lighting systems to provide even and consistent lighting on the object.
4. Zoom Lens: The camera may be equipped with a zoom lens to adjust the magnification level, enabling close-up examination of features and details on the object.
5. Calibration Artifact: A calibration artifact, often known as a calibration standard or stage micrometer, is used to calibrate the system and ensure that measurements are accurate. It serves as a known reference for setting the scale and orientation.
6. Measurement Software: Specialized measurement software is a critical component. It processes the captured images, identifies features, measures dimensions, and displays results. The software is typically user-friendly and includes various measurement tools and functions.
7. Joystick or Manual Controls: Operators use a joystick or manual controls to move the camera and focus on specific areas of the object. These controls allow for precise positioning.
8. Computer System: A computer with a monitor and interface is used to control the machine, display measurement results, and manage data. The measurement software typically runs on this computer.
9. Z-Axis Column: The Z-axis column allows the camera to be raised or lowered to focus on different areas of the object. This feature enables three-dimensional measurements and depth analysis.
10. X-Y Axis Movement: The worktable can move in the X and Y directions to position the object under the camera. This movement is essential for capturing images of different parts of the object.
11. Edge Detection Algorithms: The measurement software includes edge detection algorithms that identify features, edges, and corners within the images to facilitate measurement.
12. Dimensional Measurement Tools: The software provides a range of measurement tools for different geometric features, including points, lines, circles, arcs, angles, and distances.
13. Data Display and Visualization: Measurement results are displayed on the monitor, often in real-time, with numerical values, graphical representations, and images. These displays help operators assess the measurements.
14. Report Generation: The software allows for the generation of measurement reports, which may include measurement data, images, and pass/fail criteria. These reports can be printed or saved electronically.
15. Data Export and Integration: Measured data can be exported for further analysis or integration with other software and systems, making it easy to share measurement results.
These components and features collectively enable precise and accurate dimensional and geometric measurement, making Manual Video Measuring Machines valuable tools for quality control, research, and inspection tasks in various industries.


